Removing the fear of Django Rest Framework(DRF)
making RESTful APIs with Django
Introduction
Just started with Django and trying to get into REST API but worried about DRF or having overwhelmed feeling about it eh? Today we are gonna simplify the framework. Django is a python framework for making web applications/backend. Django focuses on rapid application developent (develop applications faster) with a lot of features packed init. Django itself doesn't have any support for building a REST API so we need to use DRF. Let's jump into this now.
Introduction to API
An API is a set of definitions and protocols for building and integrating application software. Ok, that is its definition but what does that
mean? Let's say you are hungry and you went to a cafe now you would want to order some food. You will probably ask a waiter for your order and after some time you'll receive the order. Here the waiter is an API and the cafe is the system. The waiter here has helped you communicate with the cooks of the cafe to give you some delicious meal. Your order is a request made to the API and the food you get is a valid and understandable response sent to you by the API. You can think of it as a mediator between the users or clients and the resource or web services they want to get.
Read Red Hat's Article for more.
Introduction to REST
Clear about API now? What is this REST API now? well, it is a type of API lol. Just kidding REST(Representational state transfer) is a set of architectural rules which developers follow to make an API. It takes advantage of HTPP when used for Web APIs. REST is not constrained to only one response data type XML, but instead can return XML,JSON,YAML these are more frequently used than others but REST can support any format type depending upon what the client requests and what the server sends as a response. We are gonna be JSON-focused for now. This might be confusing for now but don't worry when we will get to its actual implementation you will get this. Read MuleSoft's article for more
Introduction to JSON
JSON(JavaSript Object Notation) is a format type we use while building APIs well it's not only used in REST APIs but often you will see it as a response data sent by the server to the client when it makes a request. If you are familiar with JavaScript's Object data type it's the same thing with a little bit of difference in the syntax. Here's an example:
{
"name" : "ABC",
"age" : 14,
"interests" : ["games" , "programming" , "maths"]
}
It's like a mixture of hash table
and array where values are saved with keys. A key should be a string always enclosed with "" not '' and a value can be a string, array, integer, float, object etc. The last key should not contain a comma , at the end of its value but if there are multiple keys then another key must be followed by a comma ,. Just like the above example before age, there is a comma at the end of the value of the name but there is no comma at the end of interests. The comma rule is the same for arrays too. Formating doesn't matter in JSON but to make it look nicer your should format it.
Some Examples:
["Apple", "Mango", "Orange" ]
[
  {
    "id": 1,
    "name": "user1",
    "discriminator": "1234",
  },
  {
    "id": 2,
    "name": "user2",
    "discriminator": "1234",
  }
]
Introduction to DRF
DRF(Django Rest Framework) is a framework that is used in building REST APIs with Django. It's a framework inside of a framework. Welp that is it.
Making a project
Now Let's get to the actual implementation of it. We will be making a simple Book API for now where we add, get, delete and update books. CURD let's say for now.
Virtual Environment
This section is not compulsory but recommended if you are not familiar with virtual envs then in a nutshell it's an isolated environment where you can install packages and run your project without interfering with the global Python version installed on your PC. Read Real Python's Article for more. Open your terminal and copy and paste the following commands.
Installing virtualenv
pip install virtualenv
The following command should install vitualenv package on your PC.
Creating And Activating Virtual Environment
~/Documents/blog
❯ virtualenv example
This will create a venv folder with a name example in the folder you are in. Expected output:
created virtual environment CPython3.9.5.final.0-64 in 735ms
  creator CPython3Posix(dest=/home/__neeraj__/Documents/blog/example, clear=False, no_vcs_ignore=False, global=False)
  seeder FromAppData(download=False, pip=bundle, setuptools=bundle, wheel=bundle, via=copy, app_data_dir=/home/__neeraj__/.local/share/virtualenv)
    added seed packages: pip==21.3.1, setuptools==57.4.0, wheel==0.37.1
  activators BashActivator,CShellActivator,FishActivator,PowerShellActivator,PythonActivator,XonshActivator
If you are on Linux then use the following command
~/Documents/blog
➜ source example/bin/activate
You should see your env name like this the name of your env at the end. It can appear anywhere.
~/Documents/blog via v3.9.5 (example)
➜
For Windows users, it's quite different. Read this Article for activating it on windows
Installing Packages
If you haven't followed the venv part then no problem. Just follow me from here.
➜ pip install Django djangorestframework
Now you should have Django and DRF installed in your venv or global python version.
Starting the project and creating an App
This is pretty simple it's the same as what we do in every Django project. Note : I accidentally named the project as blog
➜ django-admin startproject blog
➜ cd blog
➜ python3 manage.py startapp home
Working with DRF
Let's add home and DRF to installed apps
INSTALLED_APPS = [
    "home",
    "rest_framework",
    "django.contrib.admin",
    "django.contrib.auth",
    "django.contrib.contenttypes",
    "django.contrib.sessions",
    "django.contrib.messages",
    "django.contrib.staticfiles",
]
Run migrations
❯ python3 manage.py migrate
Create urls.py in home app and add it to the main urls.py
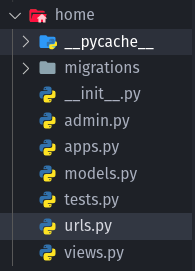 home/urls.py
from django.urls import path

urlpatterns = []
blog/urls.py
from django.urls.conf import include
urlpatterns = [
    path("admin/", admin.site.urls),
    path("", include("home.urls")),
]
Creating Model
Now let's make the Book model. Let's keep the model simple so I have included only a few rows. home/models.py
class Book(models.Model):
    name = models.CharField(max_length=40) # name of the book
    author = models.CharField(max_length=50) # author of the book
    price = models.FloatField() # price of the book

    def __str__(self) -> str:
        return self.name
Run the migrations.
➜ python3 manage.py makemigrations
➜ python3 manage.py migrate
Serializers
Now the fun part begins. Let's create some API endpoints. What do I mean by that? It's the code that allows two software programs to communicate with each other (frontend, backend). Well before that, we need to know a term we'll be using everywhere Serialization. Now, what is this Serialization? It is a process of converting a structure or object state that can be stored (for example in a file or memory).
What in world does that even mean? As we know Django ORM has its own complex data structures (querysets , model instances) and we can't simply send them as a response when a request is made. So what we need to do is Serialize them and convert them into simple data structures like JSON, XML. The whole process of converting these complex data structures into simple form is Serialization. This will be clear to you once we write the code. Now let's create our own BlogSeralizer. Create a file named serializers.py this is the file where we'll create our serializer inside the home folder.
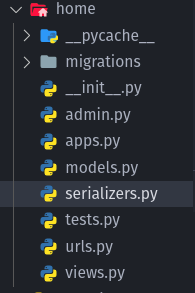
home/serializers.py
from rest_framework import serializers
from .models import Book


class BookSerializer(serializers.ModelSerializer):
    class Meta:
        model = Book
        fields = "__all__"
Let's go line by line. First, we imported the serializer module from rest_framework. After that, we created a class named BookSerializer that inherits from serializers.ModelSerializer. This part is important when you inherit from serializers.ModelSerializer helps you create a serializer of your model you won't have to define anything. It will automatically detect which fields to add and create the serializer.
In class Meta, we have added two attributes (model, fields). What do these do now?model defines which model is to be used for serialization and fields define which attribute of the model is to be included in the serializer. In this case, I have added a string __all__ this means that all the attributes of the model are to be included in the serializer. We can also define which fields to include. For that, we need to create a list that holds the attributes to be included in string format. Here's what I mean.
class BookSerializer(serializers.ModelSerializer):
    class Meta:
        model = Book
        fields = ["name" , "pirce"]
Now the serializer will only include name and price.
If you want to create a custom serializer with your custom fields then you will have to inherit from serializers.Serializer. Here is an example of it.
class ExampleSerializer(serializers.Serializer):
    name = serializers.CharField()
    age = serializers.IntegerField()
Views
Now let's make a view that sends you all the Books. You can create views using both functions and classes. I'll be using classes for this article. This one is gonna be an example view to show it actually works.
home/views.py
from rest_framework.views import APIView
from rest_framework import response


class AllBooksView(APIView):
    def get(self, request):
        return response.Response(data="all books view")
What just happen here. Well, nothing in actuality but we did something.
Here I have imported APIView from rest_framework and response. APIView is just the same as the View class which is in Django. APIView extends Django's View class, response is a module that is used for sending a response to the client after a request is made.
After that, we have a class AlllBooksView that is inheriting from API view. Inside of it, there is a method named get. This is where our request comes and where we do something with the request. It takes request and self as a parameter. Now, this can differ. This same class can handle multiple HTTPS requests. In this case, it only handles a get request if you want your endpoint to handle multiple requests in the same route then just add post(), patch() to your class. Example:
class AllBooksView(APIView):
    def get(self, request):
        return response.Response(data="all books view")

    def patch(self, request):
        """
        Handel the patch method and do send a response
        """

    def delete(self, request):
        """
        Handel the delete method and do send a response
        """
Don't worry, we will get into these, too. For now, you just need to understand the general process and methodology. Now, let's add this view to our urls.py. I am gonna create a URL named all_blogs in home.urls.
home/urls.py
from django.urls import path
from .views import AllBooksView

urlpatterns = [path("", AllBooksView.as_view())]
Aight made our first endpoint let's test it out. Run the Django server.
➜ python3 manage.py runserver
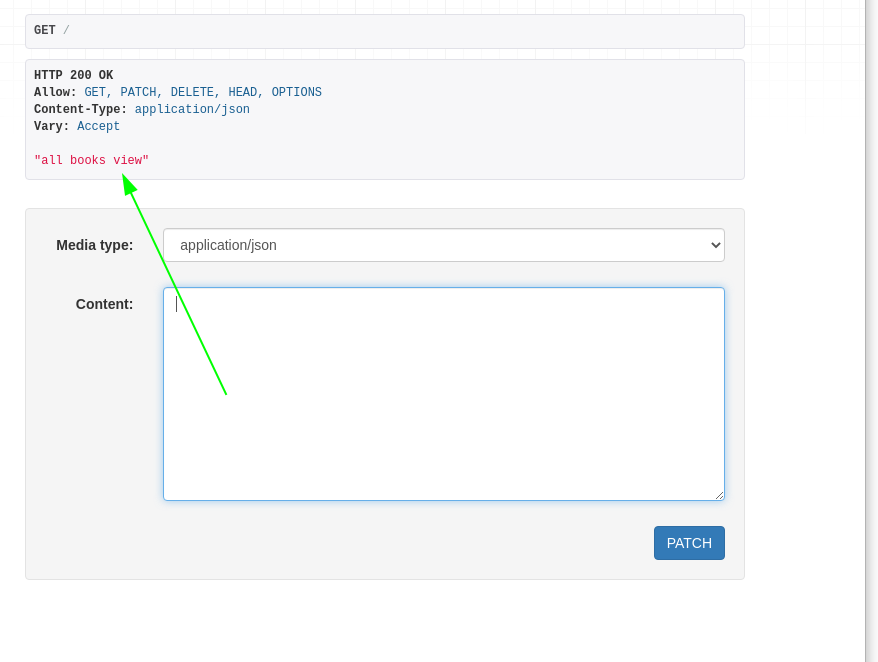
Visit the following http://127.0.0.1:8000/ URL in the browser. You will see this type of interface in your browser.
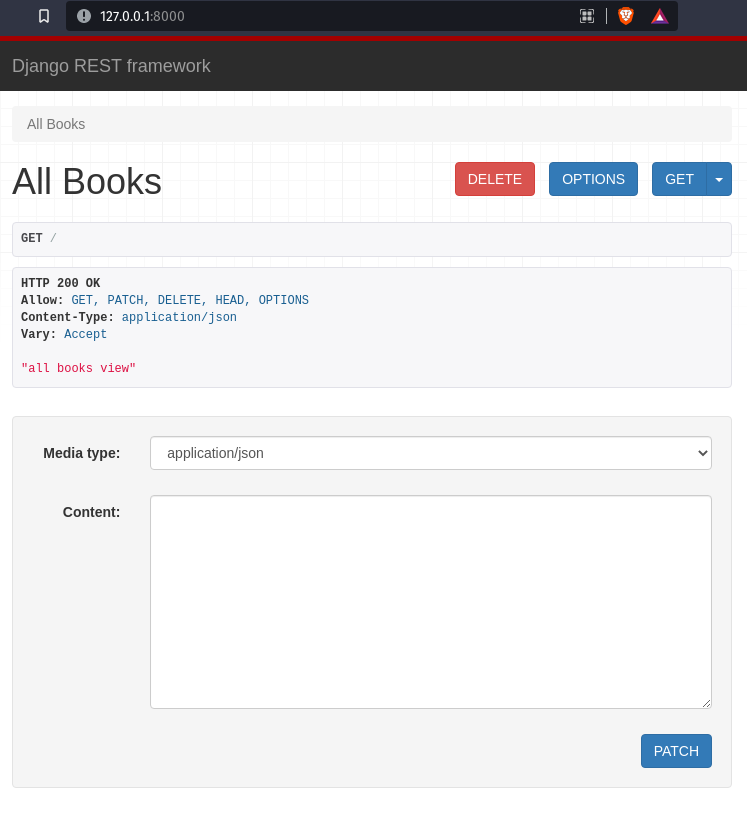
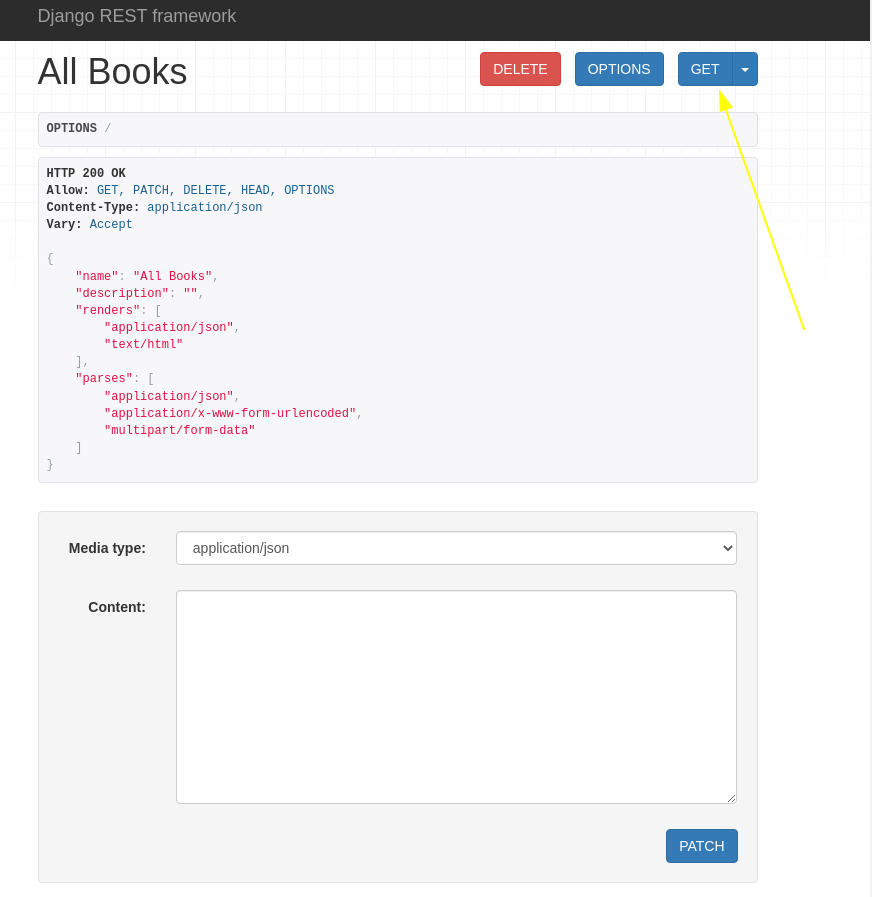
Ayee yo, we didn't write this frontend code. Where did this come from you might be thinking of? Welp, this is the work of the API view class we have inherited in our view. Let's press on the GET icon and see what happens.
Well, the page reloads. And we get a response ("all books view") back which is sent by response.Response() from our view. Well done yay you've created your first working endpoint
What if you try other methods. Well, you will get an error because every request made should send a response back to us. Since we have done nothing just added a comment to the methods it will throw an error.
Adding data to database
Enough playing around with examples now let's get to what we were doing before. Let's add some books using the Django admin panel. Create a super user and then add some books.
❯ python3 manage.py createsuperuser
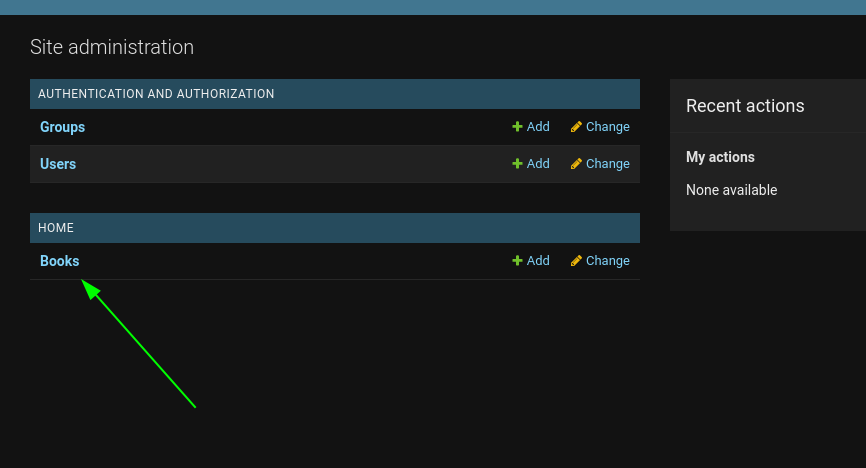
Now that we've created a superuser we need to register our model to the Django admin panel. So in home.admin.py add the following code.
home.admin.py
from django.contrib import admin
from .models import Book

admin.site.register(Book)
You should see your book model now in the admin panel.
Now let's add some gibberish example books.
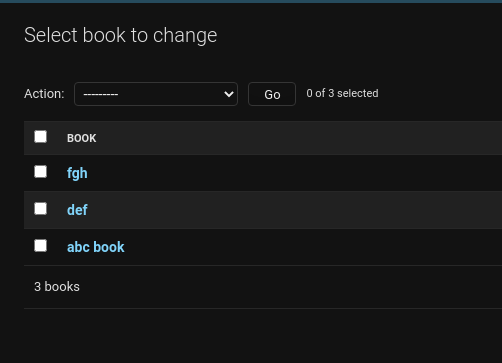 I know that I have added gibberish to it. Now let's go to our views.py and write a logic that sends us all the books. I'm gonna change the name of the view to BookAPIView and we need to import our model and serializer now. Also, make sure to change the imports in home.urls.py too.
from rest_framework.views import APIView
from .models import Book
from .serializers import BookSerializer
from rest_framework import response


class BookAPIView(APIView):
    ...
Now let's write get() method that sends us all the books from the database.
class BookAPIView(APIView):
    def get_queryset(self):
        return Book.objects.all()

    def get(self, request):
        book_serializer = BookSerializer(self.get_queryset(), many=True)
        return response.Response(data=book_serializer.data)
Well, let's go method by method this time. At first, we have this get_qeryset() method that is returning us a query set of all the books we have in your database. In get() method we have some interesting stuff going on.
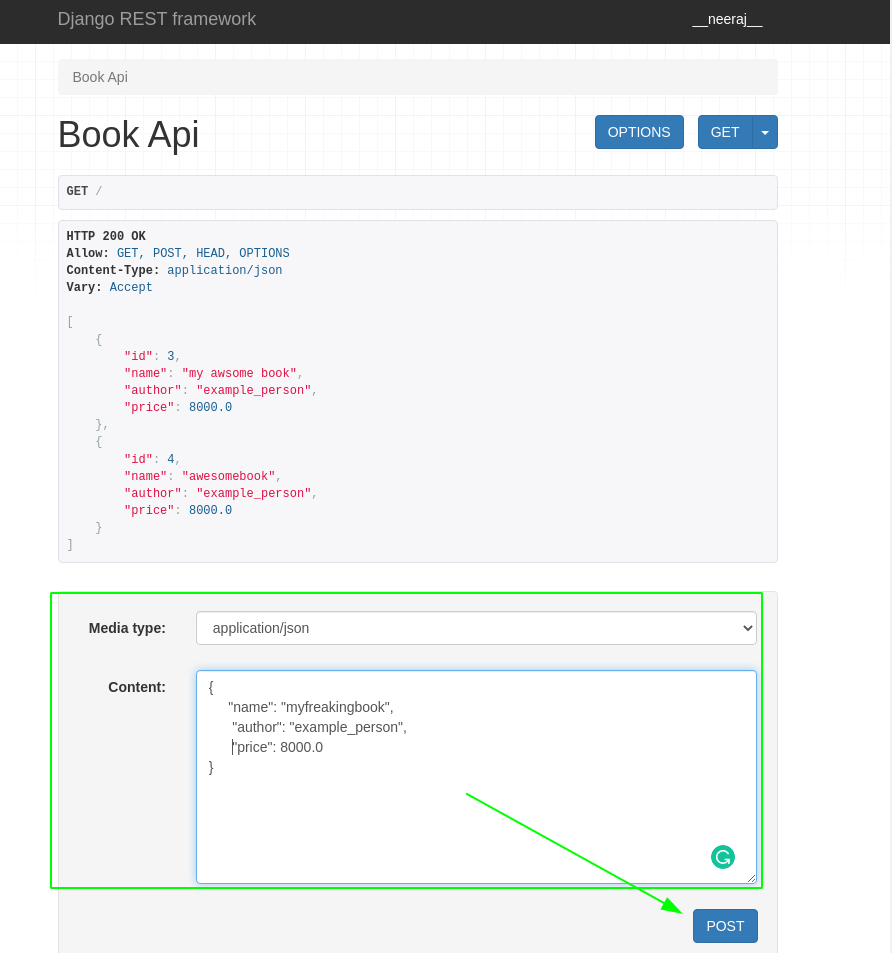
At first, we are creating a variable that is assigned as an object of BookSerializer in the object we've passed self.query_dataset() which is the data that needs to be serialized into JSON format. After that we have many = True which means that we are serializing many blog objects. After that, we are sending a Response with data as book_serializer.data which is in JSON format. Now if we visit our endpoint you can see something like this given you have added books to your database.

There are our books in JSON format. Yay, you have successfully serialized the data and sent it as a response to the client.
CRUD operations
Let's add some CRUD operations to it. For this, I will create a new view called all BookDetailAPIVIew. In this view we will add get(), patch(), and delete() methods.
Let's get into create at first. We need to add the post() method to the class for this.
class BookAPIView(APIView):
def get_queryset(self):
return Book.objects.all()
def get(self, request):
book_serializer = BookSerializer(self.get_queryset(), many=True)
return response.Response(data=book_serializer.data)
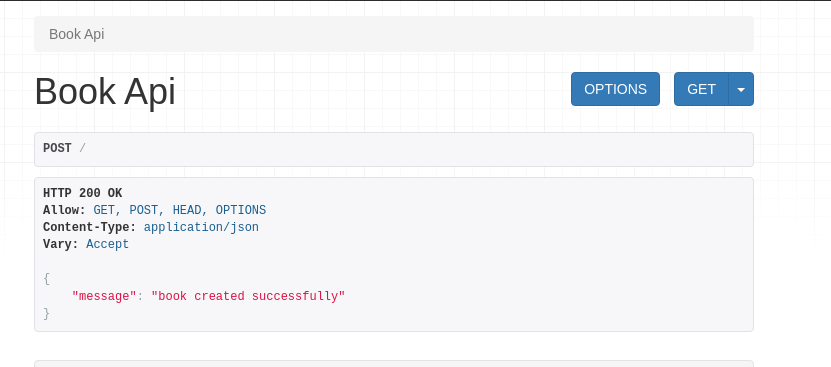
def post(self, request):
book_serializer = BookSerializer()
book_serializer.create(request.data)
return response.Response({"message": "book created successfully"})
Here, we have the post() method now. At first, we created an instance of the book serializer. After that, we called the .create() method. In the create method, we've passed the data sent by the user that can be accessed using request.data. Let's test this once.
Now let's get into other CURD operations left.
home.views.py
class BookDetailView(APIView):
    def get_queryset(self, pk):
        return Book.objects.get(pk = pk)

    def get(self, request, pk):
        book_serializer = BookSerializer(self.get_queryset(pk))
        return response.Response(data=book_serializer.data)
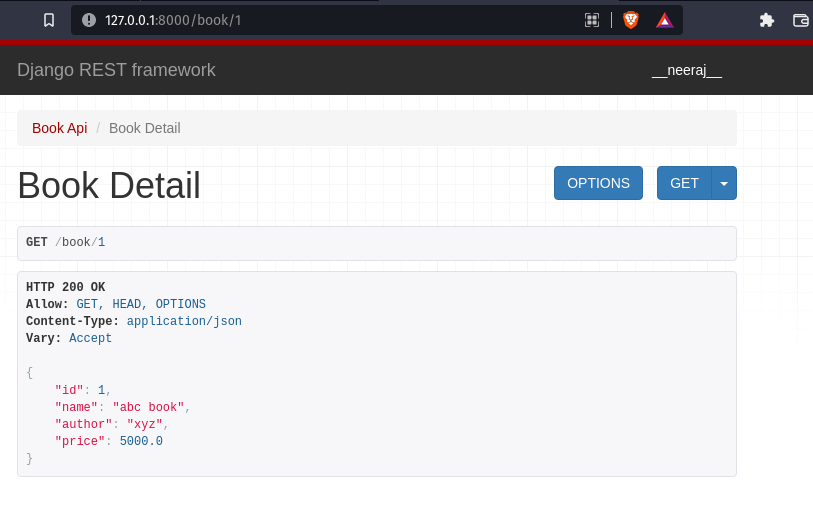
Well, the code is pretty much the same except that we are retrieving only one book so I am using the book's primary key to get it. We don't need to do many = True since only one book is supposed to be sent as a response. Now let's add the view to urls.py.
home.urls.py
urlpatterns = [
    path("", BookAPIView.as_view()),
    path("book/<int:pk>", BookDetailView.as_view()),
]
Now if you visit http://127.0.0.1:8000/book/1 you should see a valid response with a book from your database. If you enter the wrong primary key, then it will throw an error. That's for you to figure out and fix.
Now let's add delete() method to it.
class BookDetailView(APIView):
def get_queryset(self, pk):
return Book.objects.get(pk=pk)
def get(self, request, pk):
book_serializer = BookSerializer(self.get_queryset(pk))
return response.Response(data=book_serializer.data)
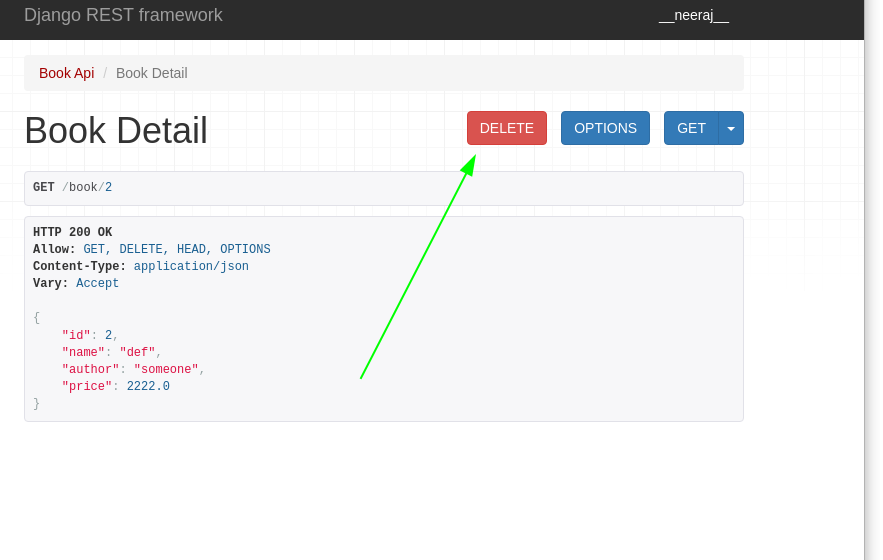
def delete(self, request, pk):
book = self.get_queryset(pk)
book.delete()
return response.Response(data={"message": "book deleted successfully"})
Now, the code is pretty much self-explanatory. But you can send two methods to this same route get and delete. Let's test this out.
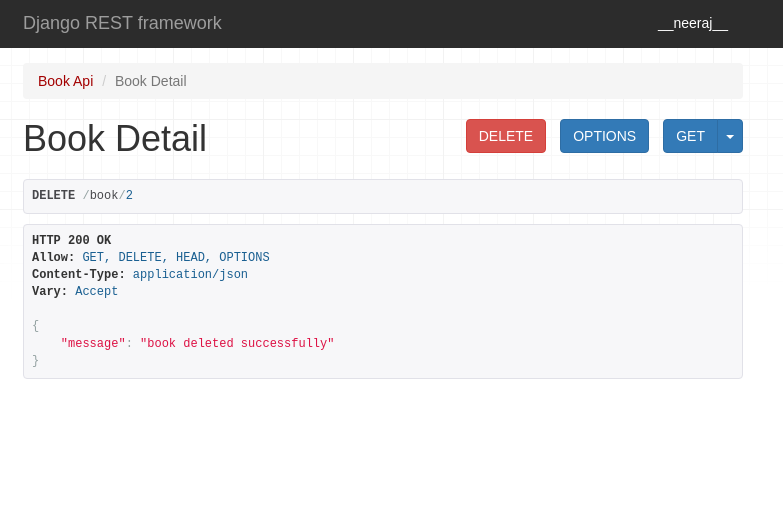 Nice, it says that the book is deleted now. If you visit the same URL, it should say that the book doesn't exist.
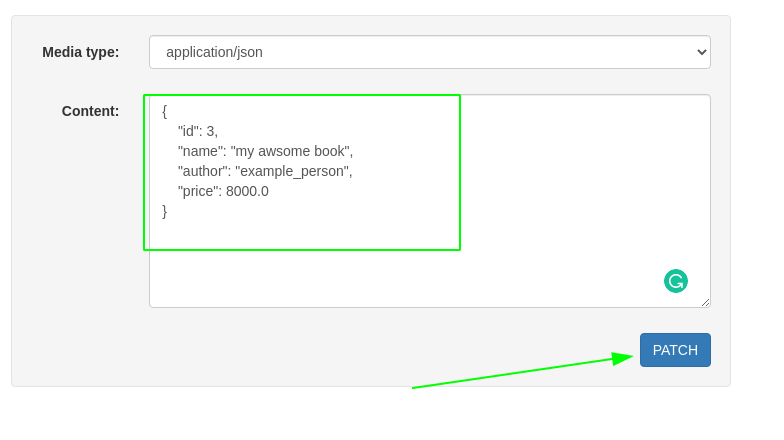
Now for the final part, let's add the patch() method to it.
class BookDetailView(APIView):
    def get_queryset(self, pk):
        return Book.objects.get(pk=pk)

    def get(self, request, pk):
        book_serializer = BookSerializer(self.get_queryset(pk))
        return response.Response(data=book_serializer.data)

    def delete(self, request, pk):
        book = self.get_queryset(pk)
        book.delete()
        return response.Response(data={"message": "book deleted successfully"})

    def patch(self, request, pk):
        book_serializer = BookSerializer()
        book_serializer.update(self.get_queryset(pk), request.data)
        return response.Response(
            data={"message": "book updated successfully", "data": request.data}
        )
This one is a little bit different. At first, we created book_serializer with empty arguments passed to it. After I have called the .update() method by passing the book object from the get_queryset method. We have also have an extra argument request.data.
It is validated_data we need to pass what data needs to be changed of the object and request.data stores the JSON sent by the user. You can check the data as well by printing it. At last, we have the response that is sending us message and the data that is updated.
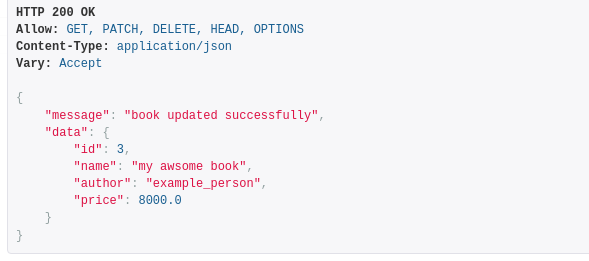
Nicely done. Here is your RESTFul API with CRUD operations.
Conclusion
DRF is extremely handy and we can easily create APIs using it. But it has a high level of abstraction in it. If you want more control over code then DRF is not the framework I would recommend. I have not used Post Man in this article which is highly recommended to use while developing APIs. You should not use the default Views provided by DRF to perform API testing.